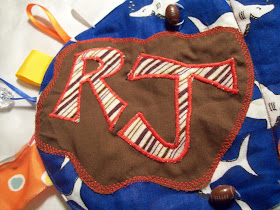

Tag quilts are really popular for babies, and so I made one for our little guy. It is basically three ovals, sewn in a tripod shape. This makes 3 "pages".


My parents call RJ "the bulldog" so I had to add one. I didn't sew down the ears or tail so they stand up off the book. Bead eyes. Nose and teeth were just embroidery thread.


This was the first time I did applique. I'm sure there are many ways to do these (bulldog, caterpillar, name) but this is how I did it and it wasn't too bad.
APPLIQUE: I drew my design on a flattened coffee filter in pencil. I put it on top of the fabric and sewed around the edges. **Remember these are the opposite so any lettering will need to be sewn backwards at this point*** After it's sewn on, I trimmed the excess fabric and coffee filter so I had the little shape. Then to attach to the page, sew along the edge in a zigzag stitch. You could also zigzag the shape the first time and then just straight stitch the applique to the page.
To do multiple layers like the bulldog, I did the background dark blue fabric first, the put the next color on top of the dark blue. I trimmed the light blue individual shapes, then the whole dog.
Most of the beads were in a big random pack from Walmart that was $2.00
I top-stitched the borders of all the pages to help hold the ribbons flat, and also sewed down the center to make the three separate pages.
I don't know if my explanation makes sense, and I'm definitely a novice with these, but if you wanted to make one, they are pretty cheap and easy...just make sure you sew the beads, buttons, etc. on well or they could become a choking hazard.


No comments:
Post a Comment
Thank you for stopping by, we love to hear from you!