


This dress was also for Ellie's birthday and is also her Easter dress for this year.
It is inspired by a dress Meg Ryan's character wears in I.Q., a romantic comedy made almost 20 years ago.
The movie is set in the 1950s and Meg Ryan's character wears lots of cute dresses.
I really liked this one, with the white contrasting details and decided to create a toddler version for Ellie.


I went with green like the movie, but rather than the olive, I used a pastel green eyelet.
The white detailing is top-stitched 1/4" wide bias tape.
A white grosgrain ribbon is at the waist and ties in the back.


My favorite part is the front loop detailing.

The white lines continue on the back where they meet at the zipper.

The dress ended up being a little big.
I was hoping to give her enough room to wear next year as well, and she'll probably be able to wear it longer than that in the bodice.
We'll just have to add a little petticoat if the skirt gets too short I guess.

The bodice had to be lined due to the holes in the eyelet, and the edges were finished with white 1/2" double fold bias tape.

I'm planning on layering it with longer sleeves for fall.

Eyelet is one of my favorite fabrics, so I'm excited to see it popping up everywhere this spring.

We took these photos at a park when we were visiting my mom in southern Utah.
Ellie insisted on wearing her green rain boots.
She's got her own sense of style that I wasn't willing to fight!


I'm excited for next week--it's 5 days of SIMPLE BLOUSES!!!
I've been pretty Ellie focused lately in my sewing, so it's been fun to recently pump out a few quick tops for myself and it will be weird to have a post every day which hasn't happened in some time.
Ellaria loves silky things.
Like my underwear she'll steal and stretch out.
So I thought she might like some silky pajamas of her own made from this giraffe printed charmeuse satin.

I didn't use a pattern and just hacked it out, thus the sleeves were weird flutter-ish cap sleeves.
I had to sew darts in them to help them curve down a little bit.

The bottoms are just simple two piece, elastic waist pants.

The top goes over the head with the little sleeves.

The back of the top has a button loop closure to allow it to fit over her head.

We couldn't celebrate her birthday on the actual day because my husband was working a 24 hour shift and would miss everything, but we did let her wear these pajamas to bed on her birthday and she didn't take them off the next day when we actually celebrated her turning two.

I can't believe she's two!
Time flies and she's grown a lot and is our little maniac.
She has so much energy and keeps me running way more than my first kid ever did!

I wish I was a cool mom that did the huge themed, napkin-straw coordinated birthday parties, but we keep it pretty simple at our house and just have a cake with "2" in sprinkles.


This is a project I think you'll love or hate.
There's no in between because it's weird, nerdy, and a titch creepy.
Kind of my nerdy spin on all the girly butterfly stuff everywhere.
I took the life cycle of monarch butterflies and appliqued the process on a little dress for Ellaria.

And I love this thing.
My husband had a Saturday off and I had some precious "alone" time and busted it out.
I hadn't sewn in a while with the new baby and preparing our house to sell, and just creating it made me so happy.
Some people exercise, shop, or get a message for "me" time, but making this was so fulfilling and fun...which is why I have a butt-load of pictures in this post.
Anyway, the idea has been mulling in my head for over a year.
In 2nd grade we spent what felt like weeks studying the life cycle of monarch butterflies and I remember having to draw and write out all the stages, so it was fun to relive it a little again.
AP Biology was also one of my favorite classes in high school.
I remember the text book had an owl on the cover and I seriously considered never turning it back in.
It was my senior year so they couldn't have tracked me down or had any real consequences, and I really wanted to keep it as a reference because it was that great and I am that nerdy.
But on to this nerd sewing this butterfly dress.

I was inspired by:
- the pretty greens and blues of the chrysalis and steps in this image.
-the jute neutral base and applique hem in Cherie from You and Mie's little Fantastic Mr. Fox tunic
-Ellie's favorite book right now is Eric Carle's The Very Hungry Caterpillar

RJ (almost 5) was really interested in learning about metamorphosis and helped me plan it out on the dress.
We watched this video over and over, he thought it was cool and I was trying to figure out which stages I wanted to sew.So basically the life cycle of a monarch butterfly starts as an egg,
then the...


I wanted the images to wrap around the dress so it wasn't just flat on the front.
So I cut out the dress front and back, and sewed the right side seam to work on the appliques with a flat surface.

The baby caterpillar ends up on the back side, but I liked the wrap effect of the imagery around the hem of the skirt.

HOW TO SEW SOME BUTTERFLIES!

The process is really quite easy, and was a lot of fun.
PAINT:
I first took a scrap of green fabric (formerly a sheet) and used fabric paint in green and a mix of blues to paint a strip of green to blue gradient.
Basically pouring a glob of green on one end and blue on the other and sloppily painting them until they slightly mix in the center.
Once dry, this strip is what I used to cut out the chrysalis pieces.
APPLIQUE:
Using the pellon fusible webbing that is double sided with paper backing, I drew out the shapes of the different fabric portions.
Next, I ironed the webbing on the back of the fabric scraps, cut out the shapes, arranged them on my skirt, peeled off the paper backing, and ironed them on.

THREAD DRAWING:
To create the details, I used my free motion presser foot and "drew" with thread.
I put the feed dogs down so I have free moving fabric and draw away.
I think my favorite aspect of the thread drawing is the sketch-like quality it gives the final shapes, like you used pen and ink.

I used different thread colors, like adding white on the butterflies and two colors of gray for the empty chrysalis.

DRESS DETAILS:
After all the time making this dress, I wanted to make sure she could wear it a while.
So it's a basic a-line jumper that is a dress now, but could be worn as a tunic with leggings when she's older.

The neck and arms use the same orange fabric as the butterfly wings with homemade bias tape.
Milky green and blue buttons finish it off on the back for the 1" wide placket.

So both Ellie and I love this little dress and I've been thinking about my next artistic, nerdy, piece of clothing to make....


Ellie has a long torso.
So most of her shirts are too short and her belly hangs out.
Lately I've been trying to whip her up some tunics and casual dresses to wear with leggings so she'll have some options other than all her belly tops.
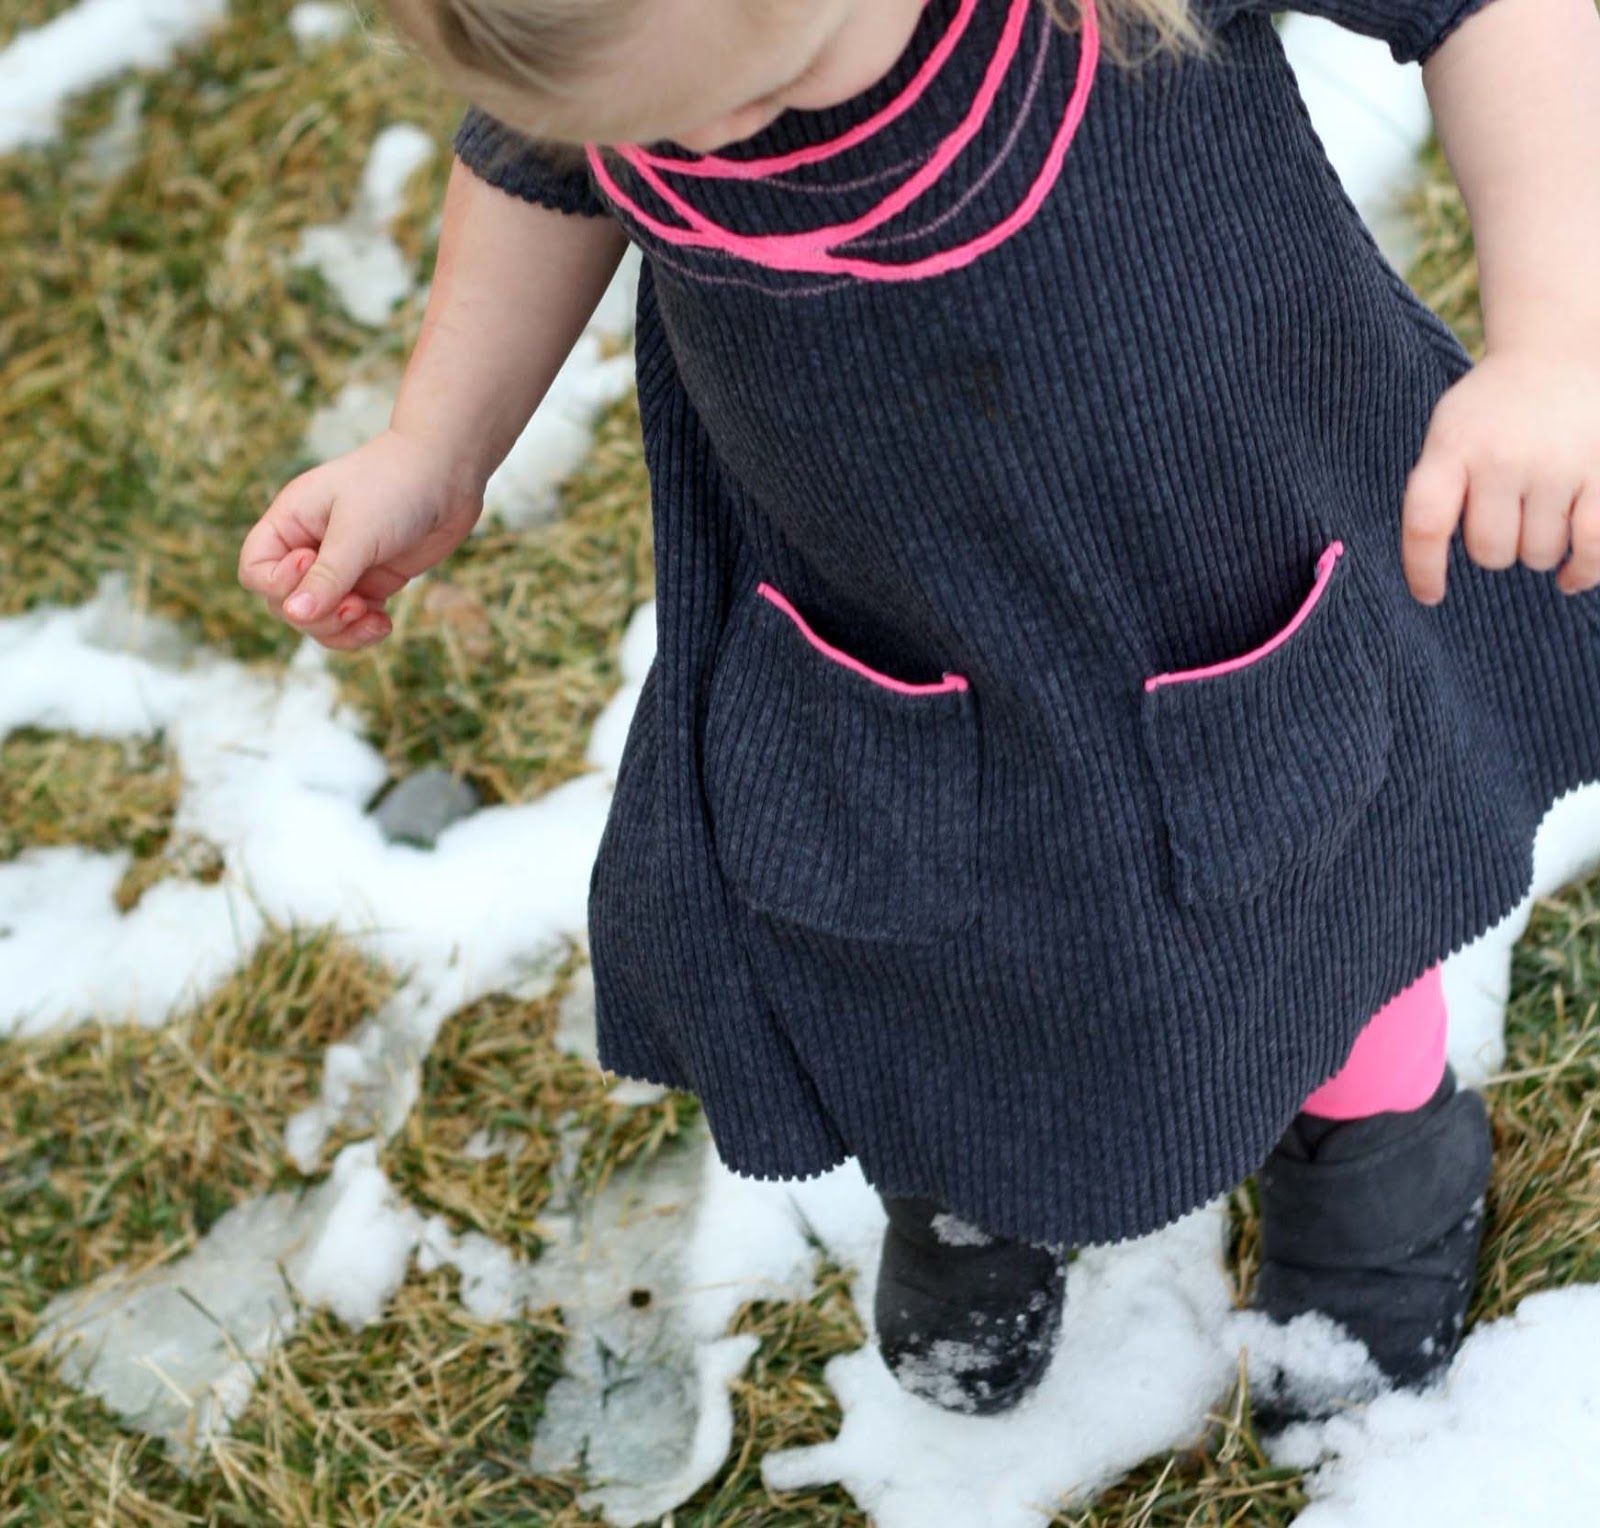
This little knit dress was inspired by a boden necklace dress and a charcoal backpack with neon trim.


The inspiration boden dress has rows of the necklaces, but I overlapped mine to give it more of a jumbled necklace look rather than the rings.
I upcycled a boys neon pink t shirt that was on sale for $3.00 for the knit trim and leggings.
The "necklaces" are strips of t-shirt 1/4" wide that are zig-zagged onto the dress.
I also added just regular pink thread zig-zags between for smaller details.

The pockets have the neon piping along the top as well.
Neon Necklace Tutorial:
1. Cut out:
-dress
-neon knit strips 1/4" wide
-front and back neckline facings = the same neck and shoulder pattern of dress but only 4" long

2. Sew facing to dress along neckline with both front and back pieces.
3. Open facings and align front and back with right sides together, sew shoulder seams making sure the dress-facing seams line up.
**You could also sew the facings and dress right sides together at shoulder seams separately, then join them sewing around the neckline, either way works.
4. Pull facing away from dress and zig-zag around, understitching (with a zig-zag or stretch stitch) facing to dress seam allowance to help keep facing down.
5. Press neck seam with facing down

5. Take your thin knit strips and zig-zag them to the dress, using the facing as stabilizer.
I drew a path with chalk then sewed it around, overlapping "necklaces" to look more natural.
I also added a zig-zag stitch between knit lines.
You could do lots of unique things or designs with the thin neon strips beyond the necklaces, and could even just use them to embellish an existing top or dress!


