My last Christmas decoration project.
I looked at a lot of different tutorials and stocking ideas {martha had a lot}, but ended up liking the Create With Me project for November and December at Ucreate.
The tutorial is from Our Cozy Nest
I LOVE the Figgy Pudding fabric from Basic Grey for Moda.
Last year I made the quilt, tree pillow, and advent envelopes from the turnover packs.
But I had bought a scrap bag, and decided my precious Figgy Pudding scraps would be good for stockings.
Now our mantle is complete.
Red= mine (mom)
Blue= Ellaria (baby girl to be born next Spring, but thought I should make hers now rather than have to next year)
Green= dad
Chocolate = RJ (son)
My husband thought they should be labeled. So I can't decide if I should use freezer paint and paint the names on the cuff, or just make fancy cardboard monograms to hang around the hangers, like these stockings.
I kind of like the monogram idea, not permanent, and seemed elegant. But my husband prefers the whole name, so we'll see what happens.
I actually didn't use the tutorial that closely for the first half. But the main idea. So here's a little mini-tutorial on what I did if you're interested.
STOCKING MINI-TUTORIAL
1. CUT INTERFACING
Rather than using batting for the front of the stockings, I used fusible interfacing--cheaper and made the process easier with less sewing.
I traced a stocking I had (rather than print and blow up a pattern) on fusible interfacing. Just make sure the sticky/ fusible side is the same direction you want your stockings to hang. I wanted my toes to the left, so cut them out with the fusible side up. I also varied the length of the stockings, and I found I prefer long skinny looking ones of different lengths.
2. ARRANGE SCRAPS
Take your fabric scraps and arrange them on each interfacing stocking the way you'd like them. Rather than sewing each piece right sides together, basically quilting the stocking top, I just plopped my scraps on the interfacing, cutting little pieces in different directions.
3. IRON SCRAPS
Once you have all the holes covered and scraps arranged, use a dry iron on the highest heat setting for your fabric to fuse your scraps to your interfacing stocking.
4. TOP STITCH RAW EDGES
To secure the scraps to the interfacing, and take care of the raw edges, I used red zig-zag on all the scrap seams.
You can see the back of the red stocking for all the top stitching showing and overlapping of some of the scraps.
5. ADD TOPPER
I added a 5" piece of fabric to the tops to go under the stocking cuff--I didn't want the cuff to cover the Figgy Pudding at all, I'm scrimping and saving each little piece.
At this point I just trimmed the extra fabric off the edges, and the front of the stocking is finished!
You can use the above Create With Me tutorial to construct the rest of your stocking.
A FEW THINGS I DID ON MINE:
-I chose to use a few inches of ribbon for the hanger rather than sewing one (once again lazy).
-Used white linen, the same fabric as the cuffs, for the backs of the stockings.
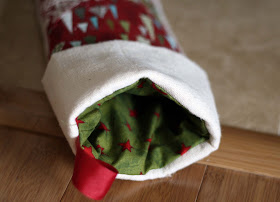
-Lined all the stockings with the same Christmas print, green with red stars I had from last year.
So now all my Christmas decor projects are all finished.
I'm going to start working on a few handmade gifts for Christmas, mainly for my little boy, if you want to stick around!


These are gorgeous and adorable all at the same time. I have been wanting to make some cute stockings for the fam. I think I will give these a try!
ReplyDeleteThese look great Jessica! I love using scraps; sometimes I've ended up with a favorite project. The stockings look so good on your new mantle.
ReplyDeleteThey look great and WOW this area of your house looks lovely!
ReplyDeleteLove this idea...we shared it on our blog today as part of our Christmas Craft Roundup! http://bit.ly/GBPcraftychristmas
ReplyDeleteJust wanted to let you know that we liked your tutorial so much we posted a link from the McCall's Patterns facebook page. Great job.
ReplyDelete