
Tree Tote
6:50 PM
Here are some basic directions for the
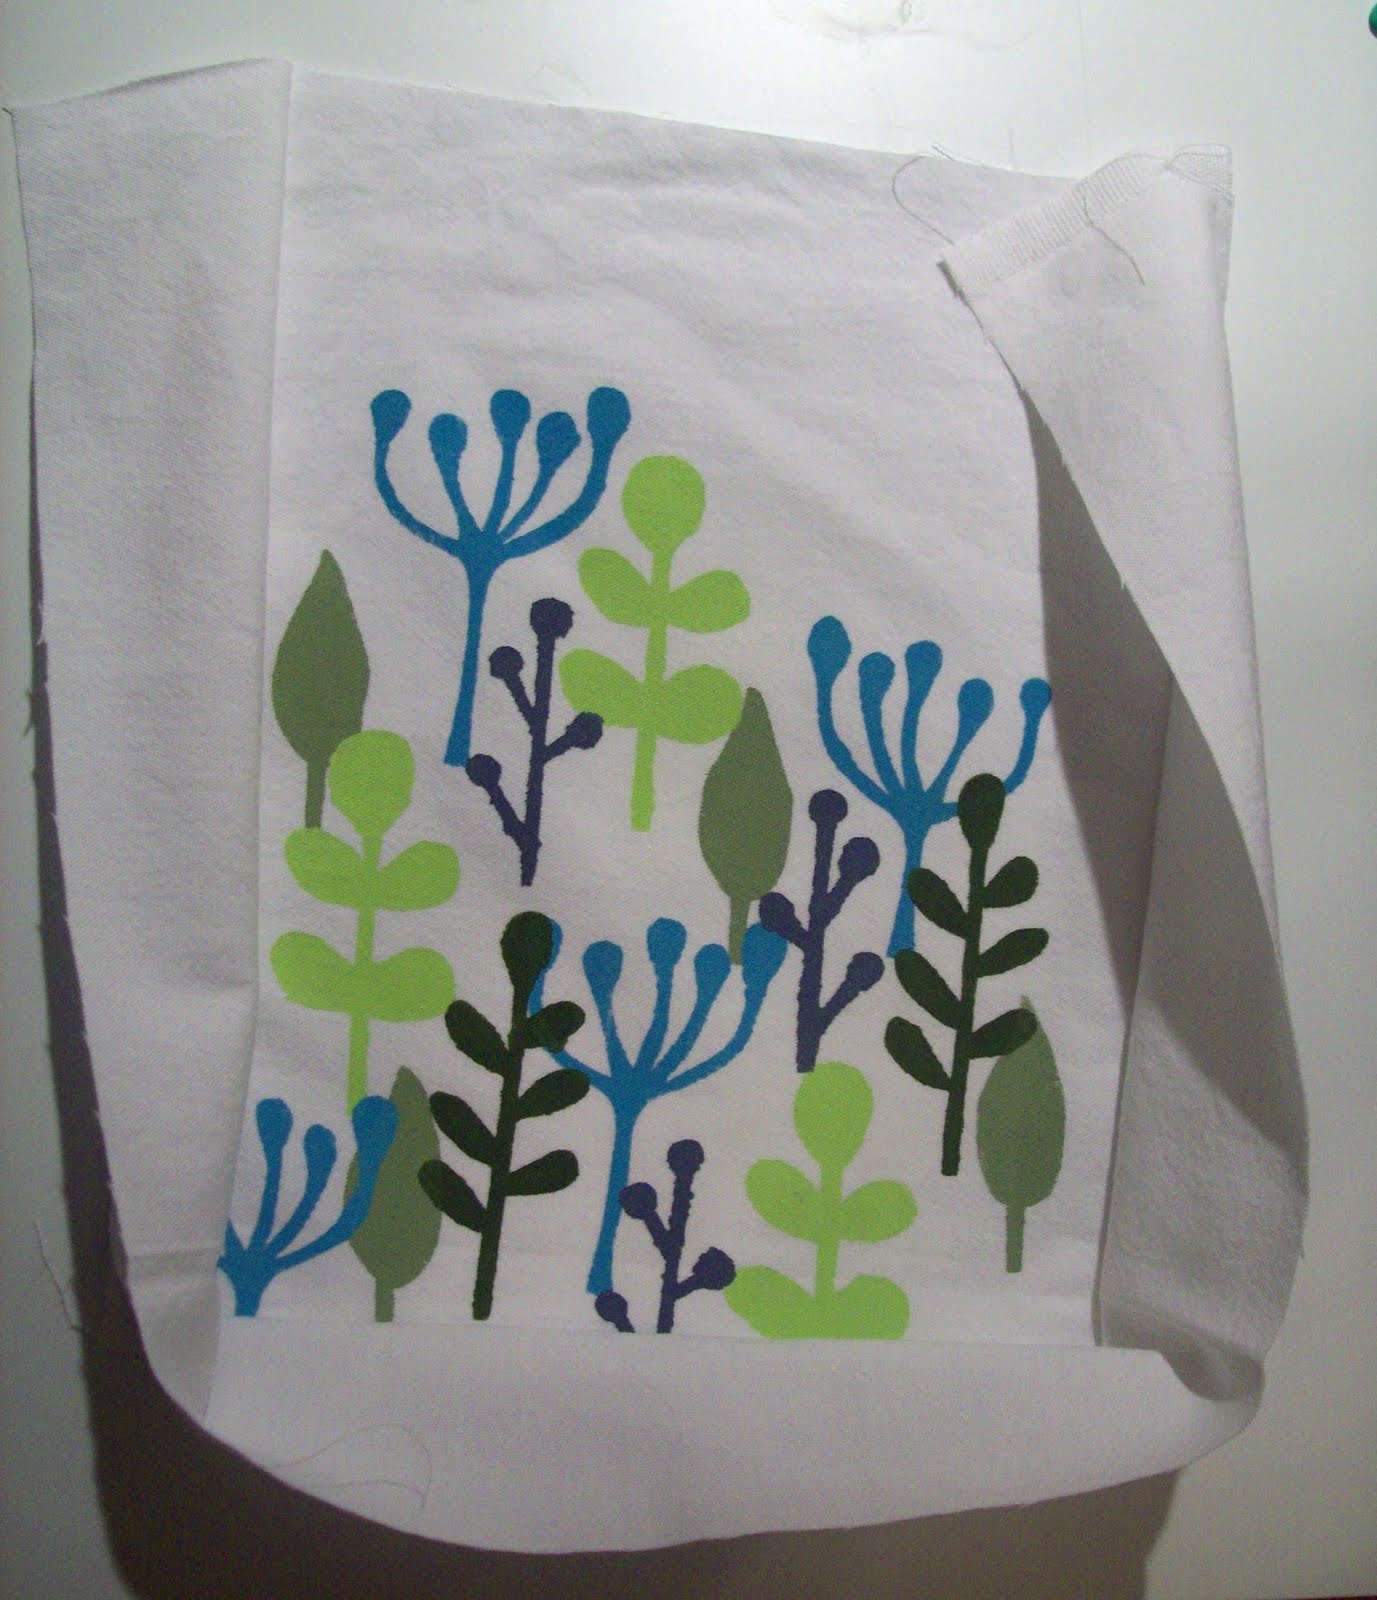
Painted Tree Tote
This is a fun project because you can design the color palette and spacing of your trees to your liking and make it your own. I was inspired for this idea from wrapping paper on a gift my husband recieved for his birthday. You never know where inspiration will come from...sometimes even the trash! I also liked the same concept of layered colors and patterns on Vanessa's canvas art project at V and Co.

Supplies:
1/2 yard outer fabric
1/2 yard lining fabric
2 yards of strap (find it by the yard in the notions section)
1 package (10) large eyelets with tool to attach
fabric paint
freezer paper
DIRECTIONS:
1. Cut your fabrics to make
-2 rectangles (12"x14")
-one long strip 4" wide and 42" long
of each color
2. Plan Your Design
Decide how many trees of each shape, and which colors you want them to be

Trace your trees on the paper side of the freezer paper.
Cut them out.
3. Paint Trees on Tote
Beginning with your lightest/ most translucent paint, position the trees where ever you want, and iron the freezer paper on the canvas. Paint the trees with your fabric paint, then peel off the paper.


Continue painting each additional layer, allowing each color to dry in between. Some brands of fabric paint require you to iron to seal paint when it's all dry.

*I chose to add another tree on the back of the tote, so paint anything else at this time.
4. Construct tote and lining
Beginning with one end of your long strip, place the right sides together, and sew down the long side of the rectangle. Put your needle in the fabric, rotate the rectangle while stretching the strip to line up, and sew across the bottom. Turn the corner again, and sew up the other side.

Pin the other rectangle right side to the raw edge of the long strip, and repeat the sewing around the edges.

So you now have a rectangular bag

5. Sew Lining
Repeat step 4 with lining fabric

Flip your outside bag right-side-out.
Keep your lining in-side-out.
6. Sew Tote Together
Place the right-side-out tree bag inside of the in-side-out lining fabric.
Sew along the open tops of the bag, but leave 3-4" unsewn.

7. Top-stitch along top edge
Pull the outside through the open hole, followed by the lining. You'll have both bags right-side-out. Then shove the lining back into the tree outside.

To close the open hole, top-stitch along the top edge 1/8" from the folded seam.

8. Place metal eyelets in Tote
Grab your packages of extra large eyelets ($4.50) and tool kit ($3.00).

Measure along the top of the tote to space your eyelets equally.
I gave it 2" in the center of each side, then 1.5" in between the rest, with one eyelet on each end.
Trace the inside of an eyelet on the fabric, then cut out these circles in both layers.

Following package instructions, attach your eyelets to the fabric.

9. Strap
Lace your 2 yards of coordinating strap through the eyelets.
Sew the 2 raw ends together, zig-zagging across the seam.

Finished!


4 comments
I love this bag...and want to try this layered paint technique soon.
ReplyDeleteAdorable bag!
ReplyDeletefirst time read your blog and it's awesome...
ReplyDeleteso sorry but i link your blog to mine. for this tutorial...
http://dinnaputriaprila.blogspot.com/2010/06/im-in-love.html
Thank you so much. U're so inspiring..
This is such a cute tutorial! I am making one for my little girl. I am using pink fabrics, flower stamps and using pink and white paint. Thanks!
ReplyDeleteThank you for stopping by, we love to hear from you!