
Scrappy Sun Hats
5:00 AM
Here's my tutorial from June that was part of Scrap Your Stash at Living With Punks.

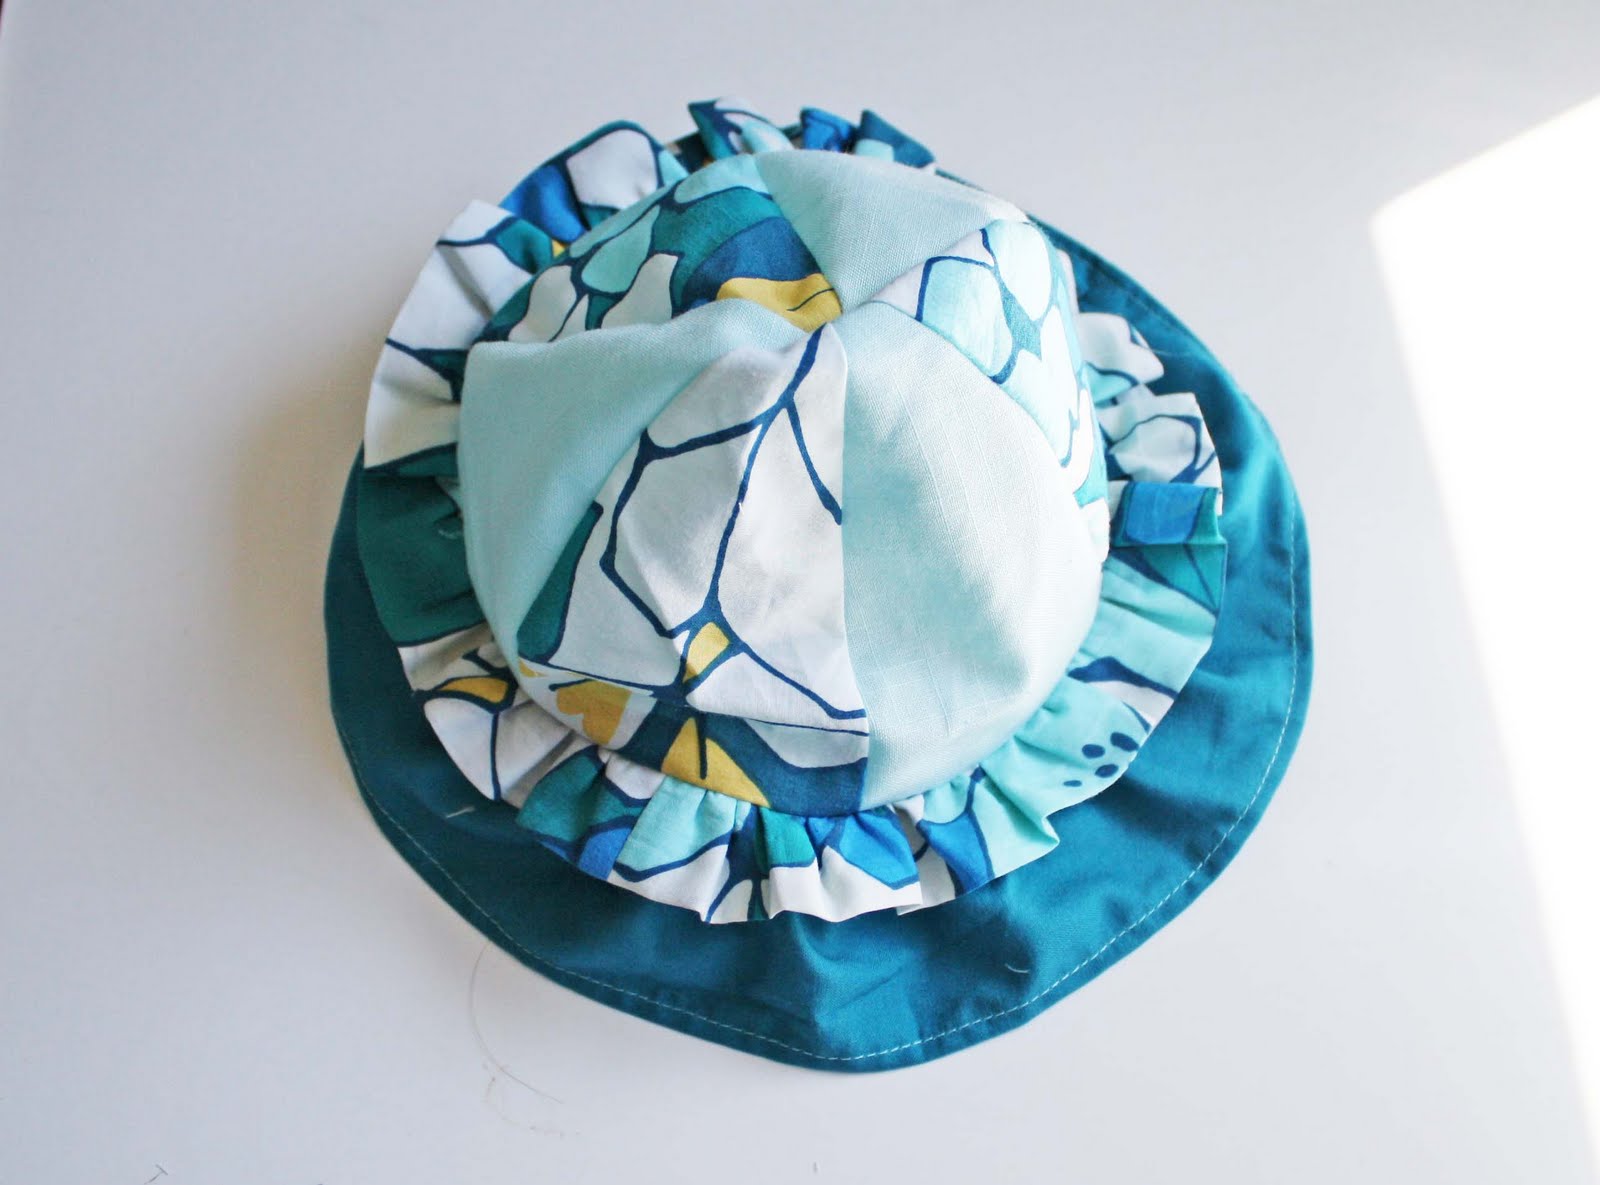
So my project can be made using random larger scraps, like the blue hat which used scraps from my Phoebe dress I made a few moths ago....

...or you can use quilting pre-cut strips like the red hat. I used the left over coordinating 2.5" strips from my daughter's baby quilt.

So this hat was created because I needed a baby sun hat for our little girl. She has huge cheeks and the swim hat I'd been using kept sliding off her head, and its brim didn't quite cover the chubba cheeks.

So I designed this hat with a tighter fitting crown and elastic chin strap so it won't fall off.
Rather than cutting the brim in a circle, you can just use scraps in strips (way less fabric useage) and the ruffle effect helps it stand out from the head to protect their face from the sun.

I have to mention my son here. I made the pattern 3 sizes, and asked him to wear the large red hat for a few pictures. I handed it to him, and he looked at me and said: "Mom....I don't like this hat." So I realize I put my son in a frilly girl's hat, but I thought it would be worth it so you could see it on a bigger noggin.
Plus it will be valuable ammunition when he's 18.

The pattern uses 6 pieces for the crown of the hat.
For the blue hat I used two different prints, and for the red I used 6 prints to make 12 sections.
So you have a lot of room to creatively use your scraps.

The hats are also lined so you don't have to worry about finishing your raw seams.
Notice here I used different brims for the wider, under brim. The blue hat has a one-layer brim that has a narrow hem. For the red hat I used two strips for a double layer brim and sewed them together so the top is stripes, and the bottom has dots.


MAKE YOUR SCRAPPY SUN HAT
Pattern has 3 sizes using the head circumference as a reference, and also includes dimensions for brim strips.
ALL SEAMS ARE 1/4" SEAM ALLOWANCE.
1. Gather your scraps
From the dress I had large enough scraps for the triangular pieces, and decided to have every other piece a solid aqua. But the red hat used quilting strips 2.5" wide, so I had to sew two strips together for each triangle piece, which is why it ended up having 12 different panels rather than the standard six. I sewed two strips together, pressed it open, then cut my triangle lining up the center seam with the center of the triangle.

2. Cut out your pieces
The pattern has directions on the width and length of the elastic, brims, and optional ribbon.
You'll need 6 triangles for the outside, 6 triangles for the inside.
NOTE: I use lingerie or fold-over elastic because it comes in colors and is really soft for those chubby baby chins. I buy mine in my husband's home town craft store, or you can find it online too. I'd recommend this etsy shop.

3. Sew Crown or Exterior of Hat
Take the exterior triangles, right sides together, and sew one side. Open and add the other triangle to the other side if you're making a pattern and sew two halves of the hat each with 3 triangles.

Take your two crown halves, right sides together, and sew them up one side and down the other in one rainbow shaped seam.

Construct another hat top with your lining triangles.

4. Make Brims
Take your brim strips and sew the two ends together.
**I had to piece my brim strips, so I ended up with a few seams to get them in one circle.

Press the seams open, then fold the narrow brim in half and iron it down.
For the under, wider brim I hemmed one edge by folding 1/8" under twice, then top-stitching it in place.
**The red hat had two strips sewn together and ironed in half, (the top stripes, the bottom dots) rather than one layer hemmed.

To get the brims to ruffle, you need to gather the raw edges. I sew a gather stitch just by increasing the stitch length to the longest (5.0) and the thread tension to the highest (10.0). This gathers the fabric as you sew. Do this on each brim.


5. Sew on both hat brims
Take your smaller brim and pin it to the crown of the hat right sides together. I had to pull the bottom thread of my gather stitching to scrunch my brim even more than what the sewing machine was able to gather. I just gathered it and fit it to the hat. Then sew all the way around.

Next we add the next layer, and pin the wider brim right sides together to the hat. You'll sew the wide brim on top of the narrow brim.

So at this point your hat has both ruffled brims sewn on.
6. Sew chin elastic
You continue to add another layer to the hat by pinning your chin elastic to each side. Make sure the elastic goes up and over the right side of the hat.

7. Sew lining to hat exterior
Now to connect the hat exterior to the lining and hide all your raw seams inside, make sure your lining is inside out and the hat exterior is right side out with the elastic over the top.
You'll place the right side out hat into the lining, essentially putting them right sides together.
Line up the seams and pin the hat to the lining all the way around.

Sew around the hat, but leave a few inches unsewn to act as a hole to flip your hat right side out.

9. Finish it up
From the hole you left, carefully pull the hat exterior out and then push the lining back up into the hat.

You will need to take care of the hole at this point. You can hand sew the lining to the hat. I am lazy and used the machine to close the hole, sewing in the ditch of the hat/ brim seam.

At this point I chose to top-stitch the yellow ribbon along the hat seam. It's merely decorative.
I had planned on adding a turquoise ribbon to the red hat, but decided not to in the end.
You're finished!


Hope these help your little ones have a sunburn free summer!


11 comments
CUTE! You have the best tutorials!
ReplyDeleteGreat tutorial, thanks for sharing, now following you with google and facebook, Karima x www.karimascrafts.com
ReplyDeleteYou amaze me yet again. I love your baby with the chubby chubby cheeks!
ReplyDeleteConnie
oh goodness, I missed this one, it's soooo adorable!
ReplyDeleteThose hats are so darn cute!! I wish I felt like I had time to craft! My life feels super crazy some days! Maybe if I took the time to craft, I would feel less stressed?
ReplyDeleteAnyway, I will have to remember this post for the future!
Wonderful post, really cute and beautiful. I was interested by your comment,
ReplyDeleteFlights to Shanghai,
Flights to Rio de Janeiro,
Flights to Melbourne,
Thank you so much!!!
ReplyDeletehttp://lacollinadellafata.blogspot.it/2013/06/summer-hat.html
Here is the link to my blog where I posted the hat I made for my daughter;) Have a wonderful summer!!!
Thanks for sharing! I whipped up a scrappy sunhat for my little one last night! You can see it on my blog: Scrappy Sunhat
ReplyDeleteI can't access the pattern. Is there any way to still get it?
ReplyDeleteLooking for the pattern too. Google Docs says I don't have access.
ReplyDeleteSorry the link was weird. This pattern is a few years old. I updated the link so it should work now. Thanks!
ReplyDeleteThank you for stopping by, we love to hear from you!