
State Legislater Chairs {Part 3}
3:25 PM

So at this point you should have a naked chair with re-finished legs.
Part 2: Prep to catch up
Here's the game plan:

TIPS BEFORE WE GET STARTED:
 -Use scrap fabric to first staple the pads and foam securely. This made it easier when I was stapling the good fabric, since I didn’t have to control the padding. So each step includes the sloppy stapling of the cheap fabric (black and red) first, then carefully stapling the good fabric on top.
-I would usually staple back, front, and sides to stabilize the fabric, then staple between to keep the fabric tight in all directions
-Most of my staples didn’t go in flush to the wood, so I hammered them in as I went
-I upholstered by myself, so everything was done stretching/ holding the fabric with my left hand, and stapling with my right hand (I am right handed and my right hand got a major workout during this project)
-As you’re cutting your fabric, make sure to pay attention if your fabric has a pattern with an up/down/stripes, etc.
- I found a trick of getting the fabric tighter if I ran my hand from the first staples, smoothing and pulling to the other side to staple it down tight. Especially when you are stretching the fabric long distances, like the back of the chair, I smoothed the fabric from the top to the bottom back with each staple to get it tight without wrinkles
If you have any questions, I'm happy to try to further explain anything that is unclear:
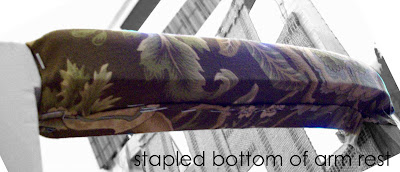
ARM RESTS
1. Cut the scrap fabric large enough to cover the arm. Place foam on wood arm rest and staple the front.

2. Stretch fabric across foam and staple the back to the frame
3. Staple the one each side in the middle, so at this point you have a staple in the front, back, and one on each side to stabilize everything
4. Stretch the sides down, keeping everything tight and staple along the sides
Finish Fabric for Arms

 1. Cut the fabric for the arms, using the old original leather for a pattern. I gave myself an extra 2-3" inches to work with.


.JPG)


 11. Stretch the fabric across to the open side and fold under fabric edge, stapling the last side down, and finish the corner as in step 9.
 At this point your chair is covered!!!
The next post will give details on finishing the edges with welting that still have exposed staples: the entire back (top and sides, around the armrests, and sides of the chairs around the legs on the front).
Each chair I tried a different way, so I’ll show both. Each has its pros and cons.
Method 1:
Folding fabric under and stapling to the underside of the frame
PROS: quicker, fabric all the way around the arm rest
CONS: not as professional, to have fabric wrapped under

 1. Cut the fabric for the arms, using the old original leather for a pattern. I gave myself an extra 2-3" inches to work with.
2. Fold ½” under and staple the front
3. Stretch it to the back and staple the fabric to the frame on the front of the chair, and wrap it around and staple to the back of the chair.


4. Staple along one side, stretching the fabric, and folding it under the arm and stapling it up to the underside of the armrest

5. Take the other side, and fold the raw edge of fabric under. Pull fabric down and over the first row of staples. Staple the second side up into the arm rest. Where the arm meets the back of the chair, you can just trim any major excess fabric.
Method 2:
Folding fabric under along edge and stapling to the sides of the frame
PROS: looks nice and professional (as long as you’re staples are accurate
CONS: takes longer and requires more skill to make it look nice
Steps 1-3 same as method 1 except you only need about 1" extra fabric for this method
4. Beginning at the front, fold in the extra fabric matching the fold to the wood. Next fold up the extra fabric on the sides, and staple the front down

5. Work your way along the sides, keeping the fabric folded up to match the edge of the wood frame. The underside of the arm will be the wood.
5. Trim any major excess fabric at the back of the chair
SEAT

1. Place foam and pads on the frame.
**There was a border of foam I threw away and needed to replace along the sides and front of the chair, using strips of foam about 2 “wide. Next I fit the green pad in tightly, topping it with the foam seat. I also found I needed an additional piece of foam (not shown) along the front of the seat: about 5” tall and the width of the seat.2. Taking the scrap fabric, I cut a piece a little narrower than the width of the seat and first stapled it along the back to the frame.
3. Stretching it tightly, I stapled in on the front in the center first, the worked along the front out to the sides

4. I cut out the fabric in each corner, and just stretched the fabric down on the sides and stapled in place
FINISH FABRIC
1. Cut the fabric for the seat using the old leather seat, once again giving yourself 1-2” on the sides, and 3-4” on the front and back
**I didn’t make the cut-outs the leather has for the legs at this point, but take note how the leather was folded and I just cut it on the chair to make sure it would all fit nicely, cutting around the frame in each corner as I went
2. I first stapled it in the center back (3 staples or so next together)

3. Stretch the fabric and staple in the center front, folding the fabric under the edge and staple up into the bottom of the frame.

4. Stretch the sides tight and staple in the middle on each side, so it’s all stabilized
5. For the front corners:
a. Fold back the fabric on an angle, I jammed my finger down in the corner to know where the corner is and snipped it. Pull fabric back out of the corner and cut on an angle from the corner of the fabric into the snip

b. Fold the raw edges under and tuck the fabric into the corner


c. Next carefully trim the fabric as you pull it around to the front. I just had to snip a little at a time until it was tight in the corner

d. Folding the fabric under along the top and sides, pull fabric around corner and staple to frame
e. Along the bottom, you have to snip the fabric because it will be stapled to the bottom of the chair. Just snip it as close to the inside of the leg as you can, then fold the fabric in front of the leg up and under, stapling it in place

f. Bring the fabric around the back of the arm rest and snip/ fold it the same way I chose to staple the sides on top of the front

6. For the back corners:
a. Fold fabric back, and feel for the corner again. This time snip in from the center of the chair, right in front of the frame

b. With the fabric folded, cut in right in front of the back of the chair, perpendicular to the arm rest. This gives the cut the most fabric to stretch the fabric around to the back of the chair.
c. Carefully snip if needed to make it tight down in the corner as you wrap it around the frame
d. snip the fabric at the front of the back leg, fold the fabric under, wrap it around to the back of the frame and staple in place, as in step 5e above .
e. Pull the other side of the fabric between the seat and back to staple to the back of the frame
BACK OF CHAIR
1. Place the green pad on, then your foam piece, making sure it's tucked down between the seat and frame

2. Using another long strip of scrap fabric, staple a few on the top of the chair on the back of the frame
***Make sure you kind of stretch the foam to stretch up to the edge of the wood on the top and the sides. This way there isn’t wood without padding
.JPG)
3. Stretch fabric down and through the space between the seat and back. But this time staple the scrap UP to the above frame, rather than down on top of the seat. You need to be able to get through the space again with your finish fabric
FINISH FABRIC

4. Cut your fabric using the old leather pieces as a pattern, leaving 1” extra on the top, 1-2” on the sides, and 3-4” on the bottom
5. Staple fabric along the top arch on the back of the frame, about 6” wide or so
6. Stretch the fabric down the back, and under the frame space and staple to the frame on top of the seat fabric, about 6” wide also
So at this point it’s secured top to bottom, and next we need to secure the sides

7. Stretch the fabric to one side, and jam your finger into the space to know how far you’ll need to cut. In the center of the arm thickness, cut straight into the fabric, then angle to each corner to go around the arm.
8. Fold the fabric under, and stretch down into the arm, and around to the back of the frame, staple to the back.

***I cut to low on some of the under arms, and had to add an extra piece of fabric to cover the wood, then just folded the fabric tightly across. NOT perfect, but I thought being under the arm, not too many people will notice.
REPEAT STEPS 7-8 ON THE OTHER ARM
9. Staple along the top to the corner, stretching the fabric at corner first, then folding the top fabric and side fabrics in and stapling it all down.
10. Work your way down the sides, wrapping it around the frame and stapling it on the frame at back of the chair
11. Bottom Back Corners:
a. Snip into the corner as done on the seat back corners
b. Pull fabric between the seat and frame, stretching fabric from top to make it nice and smooth, and staple into the back frame
c. Pull fabric out the back side, and fold the raw edge under, stretching it around and stapling it to the back of the frame, it will fold across the seat fabric at an angle


At this point all your pieces wrap around to the back and are stapled to the back of the frame.
REAR PIECE ON BACK
1. Fill the space on the back of the chair with your handfuls of Polyfil or batting
(be careful not to let your toddler get his hands on the whole box though)


2. Take 2 strips of scrap fabric, staple one strip across the back of the chair, where the frame curves in. Right around the back of the arm rests

3. Take the other scrap fabric strip and staple to the back top of the frame, then slide it under the cross scrap you just stapled, and stretch it across the bottom and staple it down tight.
*The cross strip helps keep the slight curve of the back
4. Adjust the batting if needed to make sure it’s even and smooth
5. On the back of the finish fabric, trace the old leather piece, leaving about 1” extra around the edges

6. Iron the edges of the piece down along the top and sides. The curve of the top of the chair makes it hard to lay the top straight, I had to snip the extra about every 1” so it could lay flat


7. Laying the chair on its front, align the back fabric on the chair, and carefully staple right along the edge across the top, matching the fold to the corner of the chair
8. I stapled along the fold on the edge of the chair all the way down one side

9. At the bottom, snip on the inside of the back leg, folding the fabric under and staple along the top of the leg, fold the rest of the fabric under and staple up on the underside of the bottom of the frame
10. Stretch fabric down the back, fold under the frame, and staple up into underside of the frame across the bottom.

 At this point your chair is covered!!!
The next post will give details on finishing the edges with welting that still have exposed staples: the entire back (top and sides, around the armrests, and sides of the chairs around the legs on the front).


9 comments
Congratulations. The change is incredible, it seems the same chair. a hug. Roser
ReplyDeleteHoly Cow Jess, those look amazing!! I am loving the step by step tutorials you are doing!
ReplyDeleteWe have decided to buy a house and I am SO looking forward to repurposing furniture on my small budget...I will be looking back to lots of your work for instructions!
Hey, I have a new blog for you to look at for some AWESOME furniture building...http://www.knock-offwood.com/ This lady provides really great tutorials and uses materials that are all cheap! take a look and tell me what you think.
your new chair looks very lovely! I am looking for a similair chair on craigslist so that I can copy you :)
ReplyDeleteEnhorabuena, te ha quedado preciosa.
ReplyDeleteSaludos.
Those look fantastic! Can't wait to see the finished product!
ReplyDeleteWow! Those look great!!!!
ReplyDeleteThose chairs came out amazing! Great job!
ReplyDeleteLove the fabric! Just amazing what paint, fabric and hard work can do. Great job! Thank you for sharing!!
ReplyDeleteok.. those seriously turned out beautiful!!!!! Way to go!!
ReplyDeleteThank you for stopping by, we love to hear from you!