
Brain Halloween Decor
1:23 AM
I wanted a brain specimen for the spooky table. I decided to make one for free rather than try to buy one. This brain is made with play dough and painted.

I made the play dough, using Vanessa's recipe here. It seemed like it was a failure as I was cooking it, all lumpy and reminded me of the goo that crawls off Layne Myer's plate in Better Off Dead. But once I kneaded it, the play dough was perfect and smooth. I don't know what I was thinking with the color, I should have just left it out and kept the dough white.

For the base I cut a circle of cardboard and covered it with tin foil.
To help support my brain, I used two egg holes from an egg carton.

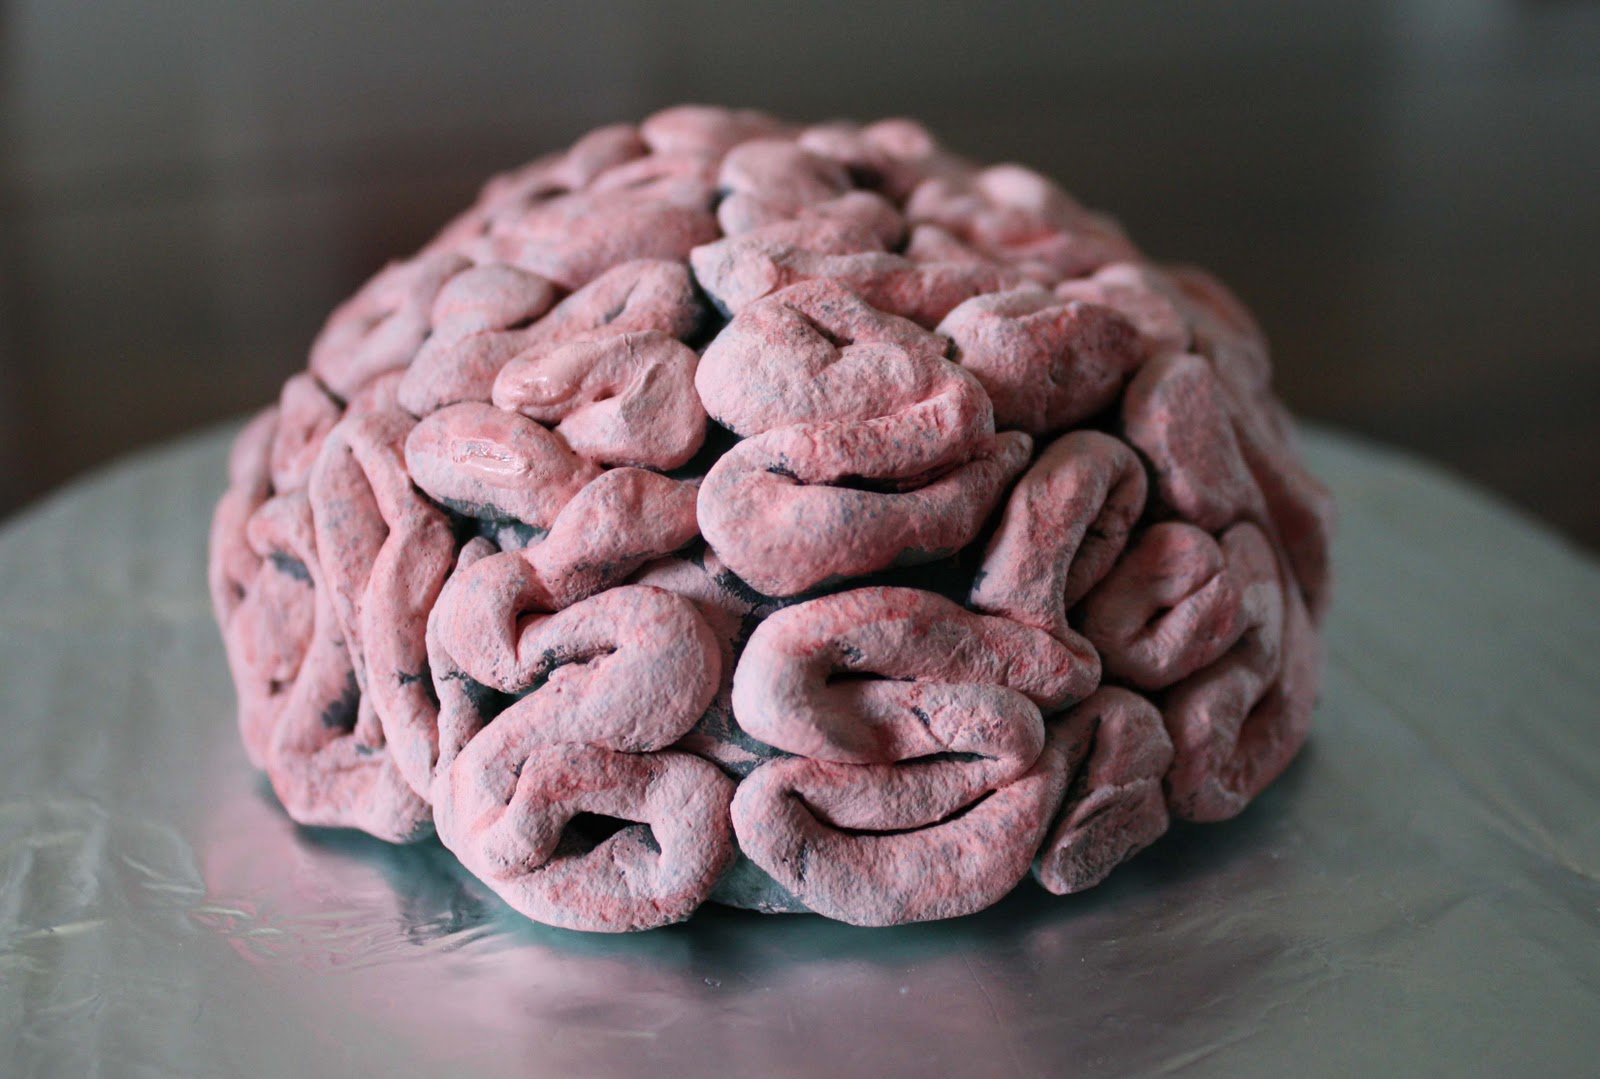
After I had a brain dome, I rolled out thin snakes of dough and pressed them on in squiggles, making one half at a time to kind of create a real brain shape with the center sulcus? (anatomy was a while ago).

Once the other side was on, my brain was formed and I let it dry for a few days.
I ended up putting it on a drying rack to let the bottom dry too. I was really impressed with the homemade dough once it was dry. It held up well and didn't really even crack anywhere. I went with homemade to save money and because I was too lazy to go to the store just for play dough, and I think it worked better.

Once my brain was dry, I actually spray painted it grey with primer. Mainly because I had the weird green.

Then I used acrylic craft paint and painted the worms a fleshy pink. I didn't paint down in between the cracks on purpose, so it would kind of have contrast.

It didn't seem real or scary enough, so I watered down some red paint and just sloppily brushed a little on the top of the worms.
The finished brain.
I had looked for a dome cover at the thrift stores, but found nothing close. I ended up taking this sloped vase instead for $.50. I wrote the info on cardstock and burned the edges, acidentally burning some writing actually, oops! then just taped it on.

I chose the name of the brain from the movie Young Frankenstein.
If you've seen the movie, you probably recognized that right away. It's a Halloween classic.

 Because the drying time, this little project spanned a few days, but it was fun. Obviously when I made the play dough, my little boy got his own chunk to play with while I made the brain.
Then he finger painted while I painted the brain. So a few artistic afternoons came from this brain.
I have seen brains in stores, and that would be easier obviously, and I don't know that a homemade brain looks that much better or anything, but it was pretty much free, and created little activities with the kid!

I think it's time to reveal the whole creepy table scape next.


5 comments
Whoa! That is a really good brain! Great job!
ReplyDeleteSo Good. I love RJ boy sitting with it. Can't wait to see you.
ReplyDeleteVery cool!!! That is one very spooky brain. Good job!
ReplyDeleteLOVE the brain! Between this tutorial and the eye balls we are going to have a great time decorating for halloween this year! (I know, I know I'm behind but this week we're decorating) :)
ReplyDeleteThanks for sharing!
Fantastic tutorial!! I think I'll have to make my own brain prop! Thanks so much for sharing ;)
ReplyDeleteRichelle Nicole @Dollusions
Thank you for stopping by, we love to hear from you!