
Ottoman Reupholster
3:36 PM
A little tutorial on reupholstering and adding storage to a dead ottoman I received as a hand me down from my mom.

This was the whole trashed set we inherited. The fabric just wasn't very durable, thus the shredded arms of the chair and entire top of the ottoman.

I had already made a slip-cover for the chair, and just recently figured out a way to resurrect the ottoman. Here's the whole set finished:

So on to the ottoman, which recently looked like this:

The top fabric totally gone, and my 2-year old had got a hold of the exposed batting on the cushion, shredding it even more.
So my new plan was to reupholster it in the matching chartreuse suede, and to flip the base of the ottoman upside down, to use as a storage chest. This would mean I'd have to build a sturdy new lid out of the trashed cushion.
MAKING THE LID
1. BUY and CUT LID BASE
I measured my base, and it was 20" x 38".
So to support the bums that would sit on this, I decided to use a sheet of 1/2" thick MDF as the base.
I bought the tiny 2'x4' sheet for $10 at Home Depot. While I was there, I had them cut it down to my dimensions.
2. MEASURE GRID FOR TUFTING
I decided to tuft the lid, so I measured off a grid to position 8 buttons on the finished top.

3. DRILL TUFTING HOLES IN BASE
The intersections of the above grid are the holes in which to thread the tufted buttons to the underside of the lid. So I used our largest drill bit 3/8" to make 8 holes where the grid intersected.

Next I had to fill in the holes in my old cushion with polyfill batting to try to make it even.
You could always buy fresh 3" thick foam and cover it with new batting, but this was free.

4. SECURE LID WITH UGLY FABRIC
To get the layers connected before I started using my nicer final fabric, I took a yard of cheap ugly fabric to connect the MDF to my cushion (and keep my globs of batting in place). I quickly stapled the two sides, trying to keep the fabric smooth and tight around the cushion. This step just makes the rest easier.

5. UPHOLSTER LID WITH FABRIC
I was using the fabric scraps from the chair slip cover, so I actually had to piece my fabric into a big enough rectangle to cover the entire lid.
Then, using a standard cheap staple gun and 1/4" staples, I stapled two sides around onto the MDF, pulling the fabric tight and smooth across the cushion. Then I worked in the opposite direction, stapling the longer sides up and around.

6. CORNERS
For the corners, I first trimmed off all the excess fabric hanging off.

Then folded the sides under to make a nice, neat edge.

7. TUFTING
To add the decorative buttons on the top of the cushion lid, you first make the buttons.
I used 7/8" fabric covered button kits you can buy in the notions section.
You also need long upholstery needles. The package I bought had 6, 8, 10, and 12" long needles. I used the 8" for my cushion.
You can use thin cording, or I just used embroidery floss quadrupled for extra strength.
The first part is the easiest, stabbing through the hole in the MDF, through the cushion and out the front of the fabric. Then you thread on a button, and stab the needle back through the cushion, aiming for the hole in the MDF.


Getting the needle back in the MDF hole was the biggest challenge. I had the cushion on its side, and kept stabbing the needle in, until it went through the hole on the other side. I kind of felt like a violinist just stabbing over and over until it made it out the hole.
Once the needle made it out the hole, you need to tie the two ends of cord. Obviously a knot would just go down the hole. I used scraps of fabric, rolled up as a blocker to tie the cord around. You could also use washers or something flat, that would probably look a little better. So I pulled the cording as deep as I wanted the button to pull, then tied it around my fabric rolls.

This is the bottom of my ottoman lid once all 8 buttons were tufted, and tied around the scrap rolls.

So at this point the cushion or lid of the ottoman is finished!

UPHOLSTER CHEST BASE
Taking base to turn it upside down to create storage room for a chest ottoman.
1. REMOVE OLD SKIRT
This ottoman had a hanging skirt and welting that pulled off easily.

Just the bare base.

Most ottomans probably have fabric stapled on the bottom to cover the inside, but ours had been torn off years ago. So this upside down view is how the storage box will be. I was just using the trampoline-like black mesh as the bottom support for the chest, then of course need to put the feet on what was the top.

2. UPHOLSTER BASE SIDES
I measured the height of the base sides, and cut fabric strips about 4" wider, to have enough to wrap on the top and bottom of the base. I sewed the strips together to make one large circle of fabric to fit around the box. I sewed it about 2-3" less than my perimeter measurement. This way, the circle of fabric was just a little too small, and fit tightly around the box.
**my suede has a little stretch, so 2-3" may be too small if your fabric doesn't stretch**

To secure the fabric to the base, staple the fabric on the bottom of the ottoman, stretching and smoothing fabric tightly as you go. Then flip it over and do the same thing to the top.

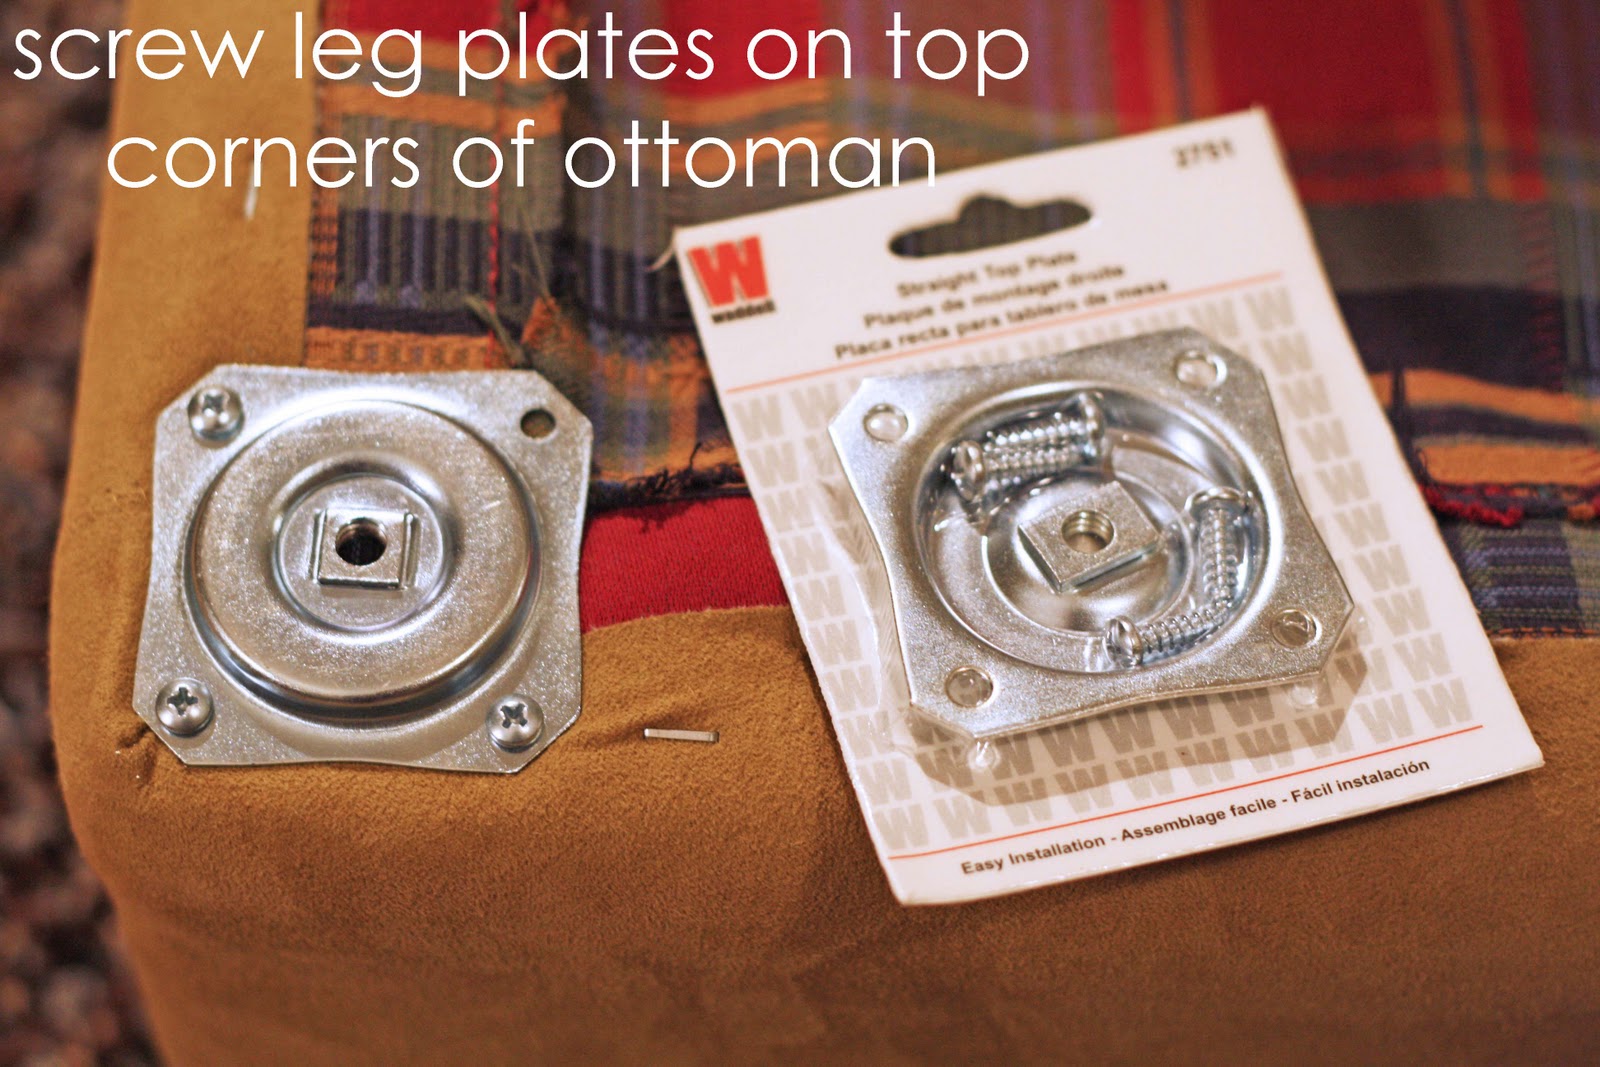
3. NEW LEG PLATES
Because I was flipping the base upside down, I needed to add new leg plates on what used to be the top of the ottoman. These plates are $1.00 each and just screw into the frame of the ottoman in each corner.
Then I used the original feet to twist into the plates.
At this point, the base is finished!
ATTACH CUSHION LID TO CHEST BASE
Obviously there are different ways to use the ottoman as a chest. You could attach stoppers to the bottom of the lid so it won't slide, and just lift the whole lid each time. But it was heavy, and I decided to use hinges to lift the lid in order to access the storage easier. I went with one skinny long "piano hinge" for $8.50. It was 30" long and 1" wide. I first screwed it to the back edge of the lid, so I could lay the lid flat and drill straight down. Then I positioned the lid on the chest base to screw in the other side of the hinge.

FINISHED!
So now the upside down base acts as a storage chest to hold quilts. Obviously, not that good-looking inside, but shut the lid and it looks a lot better than the shredded original trashy ottoman.


12 comments
Good job it Jessica, it looks wonderful. It has a whole new life.
ReplyDeleteyou are amazing! i wish i sewed as well as you do!
ReplyDeleteGreat Job!! I've had my eye on storage ottomans for awhile. Now I'll be checking out thrift stores and garage sales instead! : )
ReplyDeletewhat a change!! great job!
ReplyDeleteWow! I am convinced that there isn't anything you CAN'T do. Hats off to you!
ReplyDeletejust found your blog through various jumps (saturday night surfing) and girl, you are KILLING ME. i've only gotten this far (going backwards through all your posts) and so far i've added about 6 projects to my already giant "to-do" list (which i can't tackle til i quit my full-time job at the end of may). now i'm going to have to add this one, too. you have MAD SKILLZ, dear. and if i could paint half as good as you i'd be happier than a pig in mud.
ReplyDeleteGreat tips! I followed these and made a beautiful storage ottoman of my own. Thanks for posting!
ReplyDeleteThis is really inspiring! Excellent job. I'm off to try my own (simplified) version.
ReplyDeleteGREAT instructions! Found fabric that matched pillows I had recently bought & thought my ottoman needed a makeover. This has inspired me to do a "day off" project this week! Wonderful post! Thanks.
ReplyDeleteThis is great I just bought and old double ottoman and was wondering how to upholster it. Thanks for the great pictures and instructions. I can't wait to start this project. You are very talented and you make things look so easy. Thanks again for taking the time to help us wanta be's but aren't sure where to start.
ReplyDeleteThanks for blog :)
ReplyDeleteexcellent, this is exactly what i was searching for. I wanna make one of these for my Wife for Xmas but didn't know how to sew the corners for the base part's fabric. now I see its made first then slipped over the base and stapled...lol now, I thought it was wrapped around then sewed somehow on one corner but how to hide the seam? Well thanks for the excellent info!! Now I just need to learn to sew in the next 13 or 14 days!!! lol... wish me luck!
ReplyDeleteThank you for stopping by, we love to hear from you!