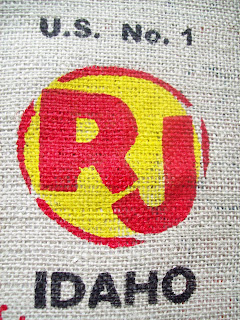
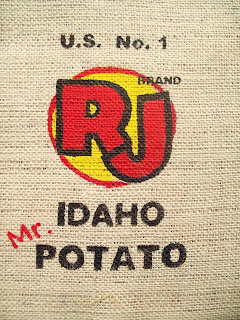
Mr. Potato Sack Tutorial
6:40 PM
DISCLAIMER: I have ugly hands, and I did my best to keep them out of the little photo steps. So if you get a glance of my nasty winter split fingers, I'm sorry...I've been lotioning like crazy. I promise.
LETS GET MAKING A POTATO SACK!
First off, you'll need:-burlap about 1/3 yard: cut 2 pieces that measure 13" x 15"
-freezer paper
-fabric paint
-lining fabric: 1/3 yard: cut 2 pieces that measure 13"x15" and a pocket: 7"x9"
-zipper 14" long
-handle, make your own out of fabric, or use ribbon/ cording/etc: 12" long
**To start: here are basic freezer paper instructions if you are new to the great craft
As I mentioned in the earlier post, I found the image I used for my potato logo online at this website. I saved the image, then put it in Microsoft Word and cropped it, increased contrast, made it black and white, and made it the size it would be on the bag. RJ is my son's name.
1. You can buy freezer paper in the craft section already in printable sheets. I am cheap and have a huge roll that was $4.00. So I just tear off a chunk and use the paper cutter to trim it to 8 1/2" wide so it will fit through my printer. Make sure you print on the paper side, not the plastic side and print off copies of your logo. You'll need one freezer paper print for each color, so for me: 3 prints.
2. Print out the text you'll need for the rest of your sack the same way.


3. Cut out the letters using scissors/ craft knife.
4. Iron on the lettering freezer paper. Paint black. I only did one coat on the burlap, I wanted it to look old and worn, not a perfect screen print. You have to really shove the paint onto the burlap, more of stippling rather than brush strokes. The paint will go through the loose weave burlap, so put cardboard underneath.

5. With each of your three logo prints, cut out each color area. So you'll end up having a layer for each color.
So for yellow, it was just an oval:
BLACK: Iron on, paint
This next part I wasn't sure if I'd try. I've never freezer painted anything so small. I also wasn't sure if the big weave would mess it up and you couldn't tell what it said. The tiny inside of each letter was the hardest part. I had to pull out the tweezers. I'd place each tiny bit in the letter, then iron it in place, move to the next tiny bit.
 1. Sew pocket onto one of your lining piece. To make the pocket, I fold down the top about 1" and zig-zag across to make the top of the pocket. Then I flip it over and iron the sides in and bottom up. Pin it on the lining and sew down one side, across the bottom, and up the other side.
 2. Serge or zigzag the lining to the burlap pieces. I serged the pocket lining to the blank burlap. Next I serged the painted burlap to the plain (no pocket) lining. Burlap just falls apart on the edges, so I serged them to the lining to prevent a mess and it falling apart.
 4. Sew two sides together. Put the burlap sides facing each other, making sure the top of the front is also the top of the pocket. Pin in place. Sew along the top with the longest seam length on your machine: 5. You should have 5/8" seam allowance on this seam. I only did 1/4" and that was stupid so don't do what I did in that department. You need a good chunk to attach your zipper to. Mine cut it close.
 6. Baste zipper on. Take your zipper,
  and lay it face down on the under (lining side) of the seam you just sewed. Unzip it. (I chose to put the zipper head right by the handle, so when it's finished you pull the zipper away from the handle to open it.) Take one side of the face-down, unzipped zipper and pin it to the seam allowance of one side. **Remember yours will have more seam allowance than my skimpy 1/4"
 7. Baste zipper to seam allowance. Sew the zipper to the edge seam allowance, making sure the teeth of the zipper are lined up right in the crack of your first seam.
 8. Zip up zipper. So you will have the zipper attached to your bag, face down, zipped up. 9. Flip sack to the burlap side. Sew down one side, across the bottom, and up the other side. I have a pressure foot for zippers, you sew to the side, about 1/4" from prior seam. The zipper has basic instructions that may help better than my explanation too. I left about 1/4 - 1/2" at the end with the zipper hanging out, then sewed up the other side.
10. Trim extra zipper hanging off the one end.
 11. Unpick the first basted seam. If everything worked, you should reveal the zipper beneath.
You can unpick with a seam ripper, but I always use a straight edged razor. It's sharper and one quick slide down the seam, rather than pulling slowly down with the seam ripper.
 12. Go back up and sew across the top right next to the handle.
Now that the zipper grippy thing is out of the way, you can sew across the top between the handle and zipper. Go over it a couple times for strength.
 13. Pin the handle in and leave the bag unzipped a few inches. This will help when you have to turn the bag right side out later.
 14. Fold the sides over, so right sides (burlap) is touching. Line up the corners so it all is straight and pin the layers together. **You kind of have to squish the zipper down here.
Now you just have to sew up the sides!
 15. Starting on the right corner (no
  handle) sew down that seam, across the bottom of the bag, and back up finishing at the handle. I used 1/4" seam allowance and 2 stitch length. To get over the handle thickness, I had to lift my pressure foot a little bit. I also went back over that part to strength it.
16. Trim off the bottom corners a little so when you flip it, the corners can make a crisp corner.
YOU ARE FINISHED!


3 comments
LOVE this and featured today!!
ReplyDeleteI will not agree on it. I regard as warm-hearted post. Particularly the appellation attracted me to review the sound story.
ReplyDeleteNice brief and this post helped me alot in my college assignement. Say thank you you on your information.
ReplyDeleteThank you for stopping by, we love to hear from you!