
Faux Chenille Baby Blankets
5:00 AM
Thanks for everyone's comments on the Baby Sleep Sacks below. A tutorial is in the works!

I'm a big fan of the faux chenille technique:
scarf
scarf
But I finally made the baby blankets.
Another tutorial form Aesthetic Nest.
**I would say I don't use the spray adhesive as shown in Dana's tutorial. I tried it once --it's messy and totally gummed up my blade. I just iron each layer with starch and they lay flat and it works great for me. Especially with the flannel, the layers stick to each other pretty well.
**I would say I don't use the spray adhesive as shown in Dana's tutorial. I tried it once --it's messy and totally gummed up my blade. I just iron each layer with starch and they lay flat and it works great for me. Especially with the flannel, the layers stick to each other pretty well.
This first one is the same as the tutorials, although I do recommend the Olfa Chenille Blade. I cut all the rows for this pirate blanket in 10 minutes. I do have to stop occasionally to clean out the blade from fluff build up, but it makes it really quick compared to cutting each row with scissors. I got mine from JoAnn's website with 50% off coupon, I don't think they carry it in stores.

This first one is for my nephew. My sister-in-law and I actually have the exact same due date, so we'll see how close these two cousins end up being born.
The flannel top is a pirate print.

The back just has the straight rows of chenille 1/2" apart.

I did 3 layers of flannel for the chenille: red, light blue, and brown.

This next blanket was an experiment, so I planned to keep it for our baby girl--just in case my idea didn't work out. I was reading in the little pamphlet on my Chenille Blade and it said you could sew straight lines on the bias, or curved.

So my big idea:
SEW WAVES RATHER THAN STRAIGHT LINES

So rather than sewing straight lines diagonally on the bias, I drew a wavy center line down the center.
I worked my way out from the middle, sewing the lines 1/2" apart.

DID IT WORK?
I'd say yes and no.
From the beginning I worried about the sections that would wave off the bias, and how that would fray differently from the true 45 degree bias.
Yes, it was a concern. Sections of the chenille frayed in shaggy strips rather than fuzzing up like the true bias cuts. So on the back of the blanket, there were sections of longer shag fray.
You can see the long shaggy fray strip in the center.

Here's a close up of the shag fray:

The first washing/ drying it was quite long and I trimmed it all off with scissors.
I wondered if there would come a point where it would just stop fraying and be done.
The second time I washed/ dried the blanket there was significantly less shaggy fray. So I think this wavy technique will work, you'll just have to have a few trimming sessions in the beginning, and then there will be the strips where the chenille will look different.
I thought it looked really cool with the waves, but more high maintenance having to trim the strips of shaggy frayed chenille.
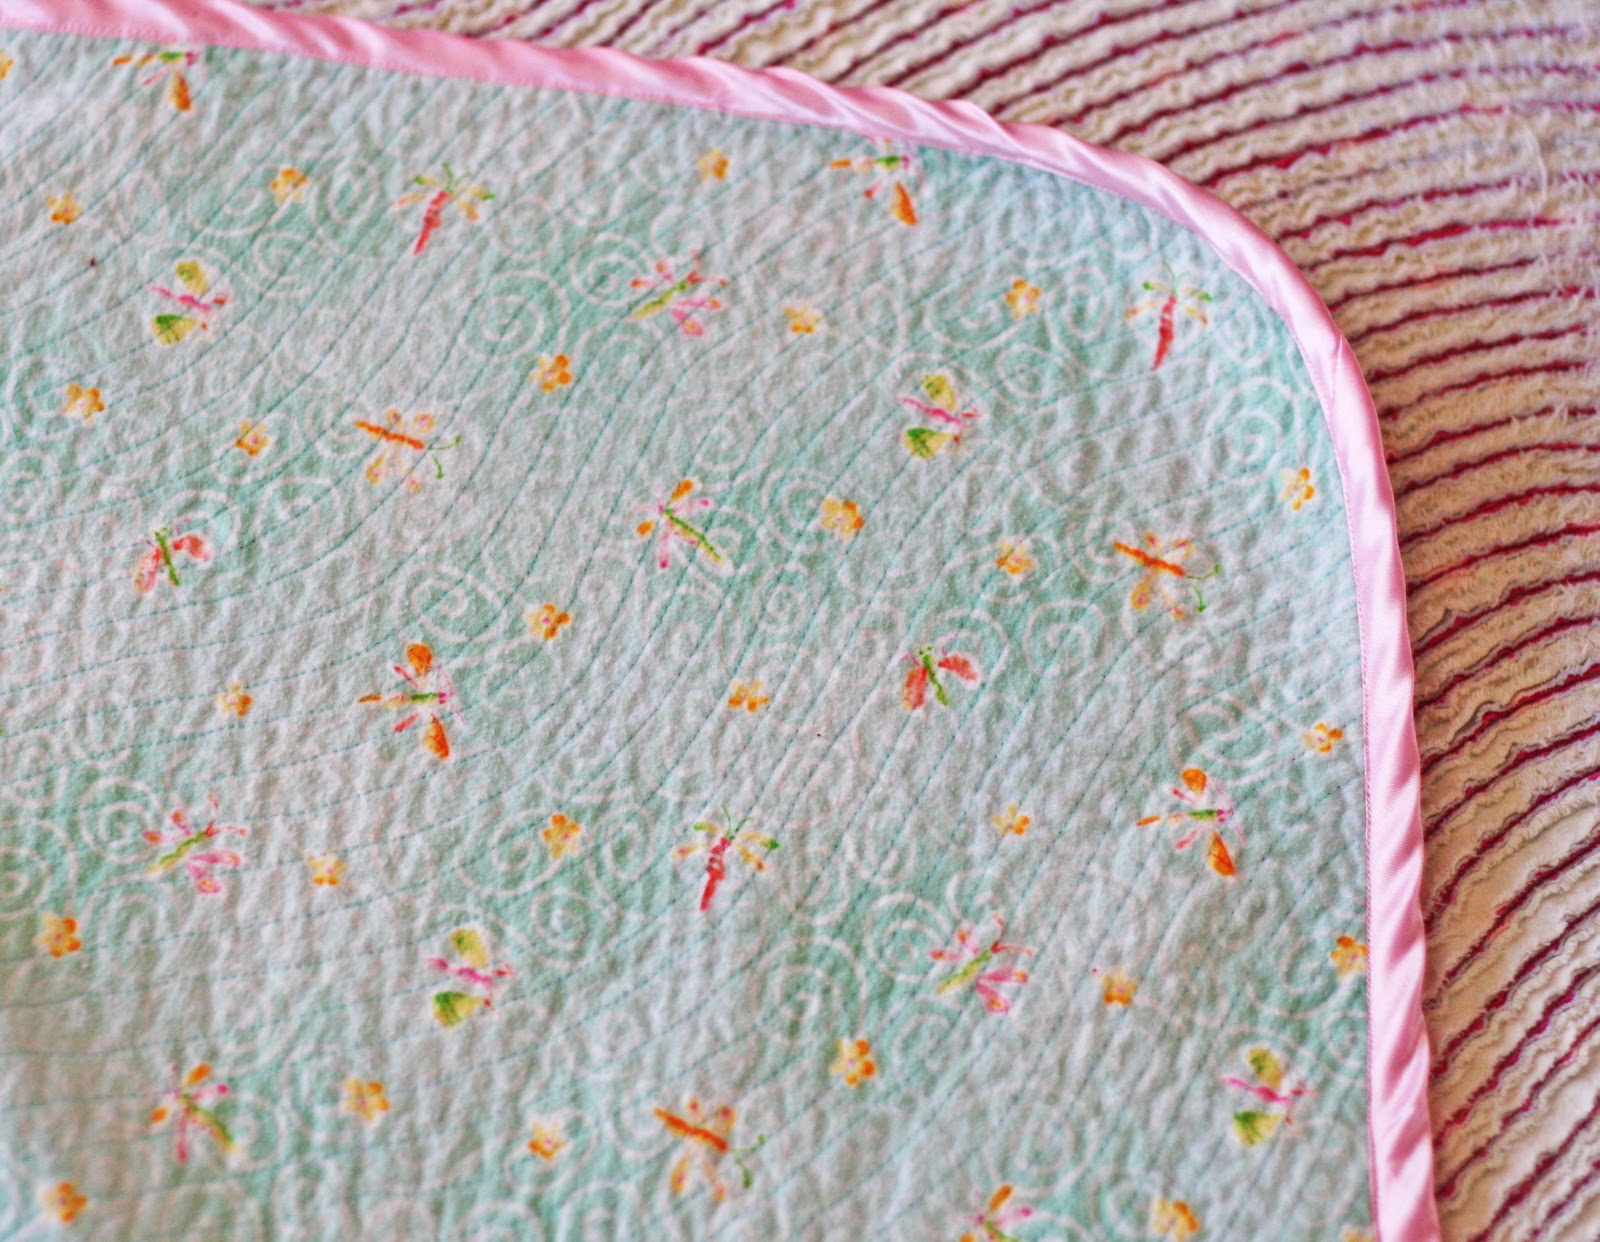
The regular chenille had pink on the bottom, then light blue and ivory on top.

The top is a turquoise flannel with butterflies and dragonflies.
So fun little baby blankets, that only get better with wear and tear.


9 comments
Thakns for the tips for this project. I haven't seen one of those blades before, but would definitely get one before I made one of these blankets. My cousin makes these. I think she uses her applique scissors.
ReplyDeleteThese are great little blankets. Awesome that the cousins are due on the same day!
I have been thinking of attempting some blankets like these.....
ReplyDeleteDo I dare?
Love the wave. It adds more character to the blanket. Very cute prints.
ReplyDeleteI can attest to how wonderful these blankets are. My mom made one for my daughter who is 7, and it looks just as good as it did 7 years ago...with multiple washing.
ReplyDeleteI love this! I've been sewing for years and have never seen this before. I have it bookmarked now and plan on making a sofa blanket for each of my daughters for Christmas like this.
ReplyDeletegreat job! the wavy lines are so unique! (i am so jealous of your olfa chenille cutter, btw)
ReplyDeleteI love these :) I have made several- I think they are a lot of work- but so fun!
ReplyDeleteSo my little girl is due in a couple weeks, and I SOOO want one of these, (just waiting for my cutter to come in the mail... Wahoo!) but I'm curious, if I do a rectangle blanket instead of a square do I still stitch and cut on the diagonal or do I need to do it to the square to stay on the bias? If I just do it on the diagonal will I get the longer fray like you did on the curved blanket?
ReplyDeleteyou're right, joann has the olfa cutter online, but not in their stores--but hancock has it (at least mine does) in their store! and they take joann coupons, too. ;)
ReplyDeleteThank you for stopping by, we love to hear from you!