
Sideboard Refinish
12:09 AM
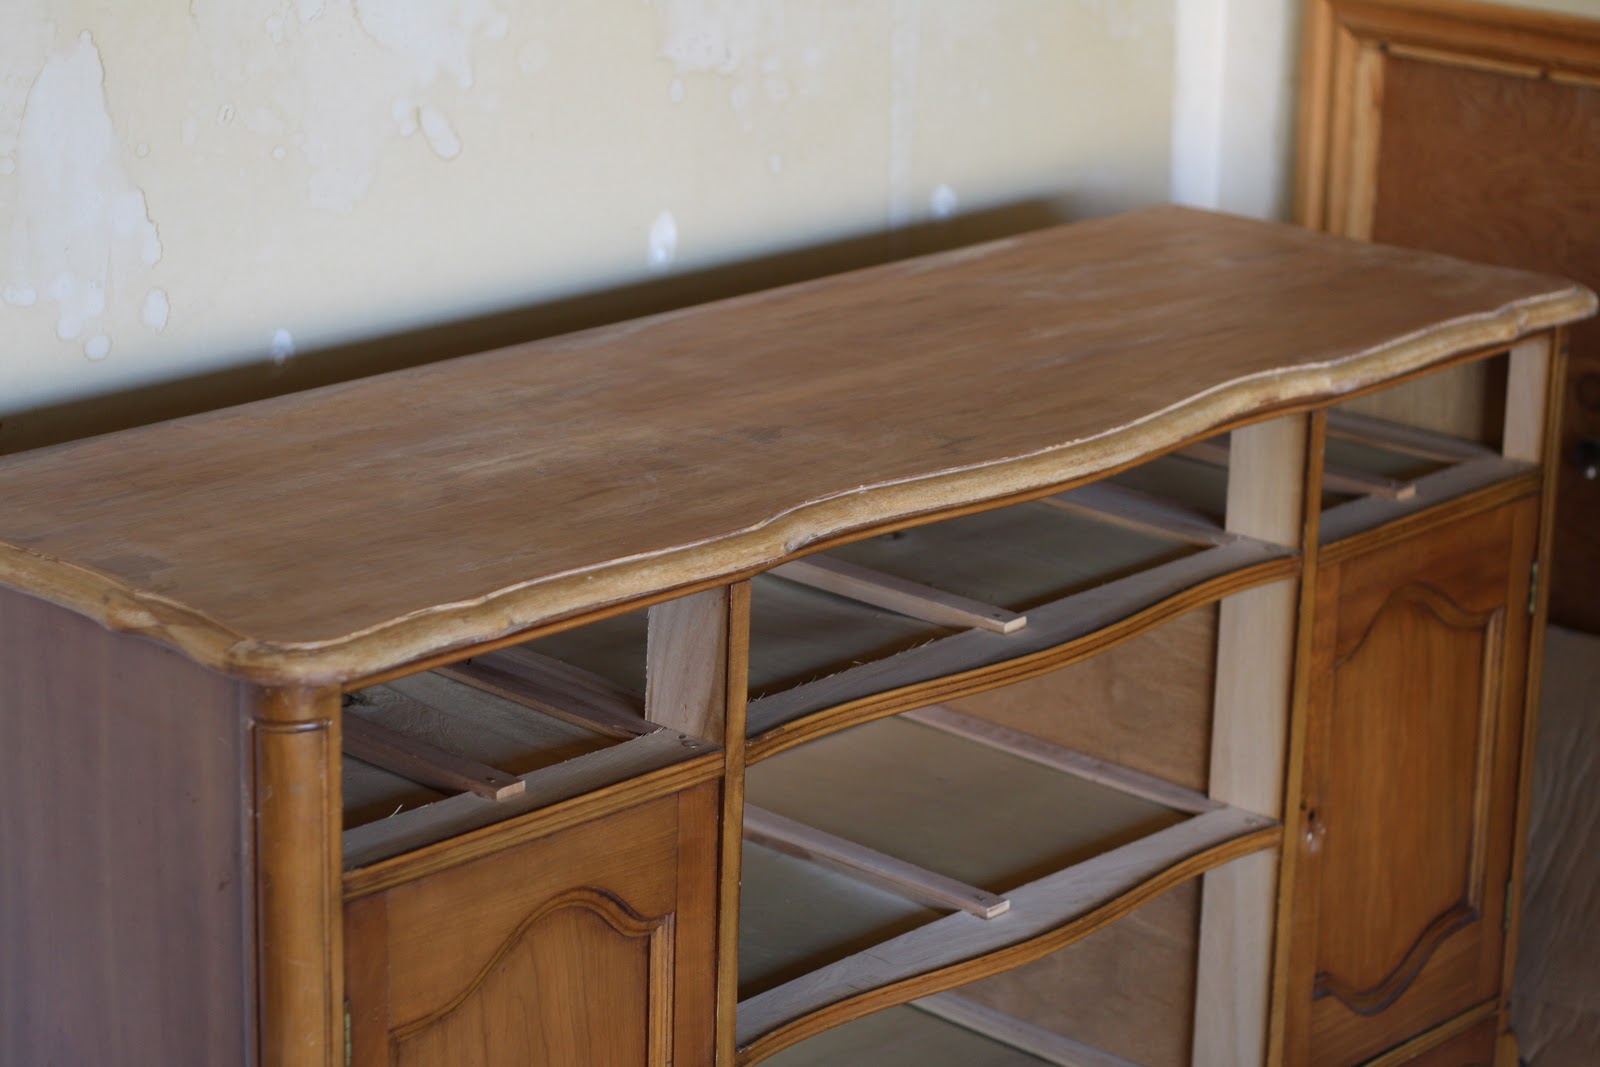
My mom bought me this sideboard from a local online classified. She bartered her way down to $30, and this was my birthday present last month. The listing was only up 5 minutes and she snagged it. When she was picking it up that night, the seller said he'd got over 40 more calls after she called about it. So you know your mom loves you when she'll drive over 30 miles to buy you some junk for your birthday. Actually, it's not too junky, it was in pretty good condition.

1. Strip
So the first step was to remove the hardware and strip the top. I use a chemical wood stripper that breaks down the polyurethane so you can just scrape it off. After it was all scraped off, I poured mineral spirits on the top and scrubbed it with a scouring pad to get rid of the chemical stripper. I also have a grout brush for the routed edges.
2. Sand
I was using new hardware, so you can see the white holes in the drawers that have been filled with wood filler.
I started sanding the drawer fronts and body of the sideboard, but didn't do much because I hate sanding and I'm lazy, and was painting everything and decided it wasn't necessary.

But I did sand the top, because I wasn't painting the top, but planning on staining it.
Despite hating sanding, it went pretty quick. I sanded like you're supposed to, starting with 60 grit to get out the deep gouges and sand any last spots of old varnish.
Then went to 100 grit, a round of 150 grit and finally 220 grit to make things really smooth and just raw wood.

3. Prime
I decided to prime first. I used oil based primer for durability and primed the front of the drawers and the body of the sideboard.

**I use a small sponge roller for painting furniture. It goes on smoother than a brush, and they are small enough you can use it on the majority of the furniture, and just fill in the cracks and edges with a brush.

4. Stain
I chose to stain the top straight Cherry. One coat of Minwax Cherry stain was dark enough for me. With stain you just paint it on with a brush, let it soak up to 15 min, then wipe it off with clean dry cloths. I just cut up old nasty shirts I was going to throw away, or mis-matched lonely socks work well too.

5. Paint
I used the same paint as the shelf backing: Behr's Waterscape in flat.
I painted two coats, having to wait 4 hours between to let it dry.


6. Glaze
This is my least favorite part. I think it's easier when you distress the furniture and then just use the same wood stain to age it. But I didn't want the distress in this case, so I went with the glazing technique.
I mixed acrylic craft paint in burnt umber into glaze. Using a paint brush, you paint a thin coat of glaze then wipe away anything you don't want. So on these door fronts the glaze is thickest in the grooves. The rest of the surfaces is just a thin wash of vertical wiping. Maybe because I'm kind of a slob, I have a hard time making the glazing look uniform. But then I keep going assuming no one's going to be looking that close.

7. Polyurethane
I only did one coat on the blue glazed body and drawer fronts of semi-gloss polyurethane. But for the stained wood top, I did two coats, sanding in between like the can says, even though I hate sanding again when I'm almost done with the whole project.
8. Hardware
I decided to use more modern hardware than the flowery big handles it came with. I bought the cheap $1.20 brass pulls from Lowes again, like I did on this dresser. I don't like brass, so I refinished the handles. It's super easy: just spray with spray paint primer, then 2 coats of spray paint in Nickle.
Then you have to re-drill holes in all the drawer fronts for the new hardware. This can be a major pain to measure over and over to center the holes, then have the holes the correct distance apart.
So this is my trick that made it quick and I didn't measure anything.
I first make a paper template by poking holes for the distance between the screws on the handle.
Then on the actual drawers, I used the old holes for my guide on centering the handles. These holes were filled really poorly, and so you can really see them, but the new handles covered them so I didn't care.
So I just lined up my paper template right between the old holes, and drilled away. Obviously not a perfect technique, you can see these holes I drilled weren't perfectly between the old holes. But all the holes were the correct distance apart to screw the handles on, and overall they were centered.
Makes it quick and easy!

So now we have a place to store all our CDs, movies, and other things. Because this is actually a sideboard/ buffet, the one drawer has dividers for silverware, and that is where we keep the remotes.

I was actually kind of nervous the silver cup hardware wouldn't work with the curvy style of the body. But after it was all done, I decided I liked the mix of the old and new.


I also ended up really liking the two-tone wood and paint combo. It's nice to have the actual wood grain on top.

So this wall is starting to look a lot better. I'm still working on the loading the shelves.
That is got me at a stand still. How hard should it be to put your crap on your shelves? I don't know why it seems like such a big task to get right to me.

Scroll down to the post below to vote on what you think of that watercolor hung off the shelving...if you have an opinion about it.
Thanks!


17 comments
It's gorgeous! And I love the yellow lamps, especially that they aren't exactly alike!
ReplyDeleteThat looks great, especially with your lamps! What a great find for your mother and YOU! :)
ReplyDeleteIt's beautiful! And what a steal! I'm never good at stripping down furniture...I am lazy and just sand. This turned out great!
ReplyDeleteYour sideboard is beautful! I think I'd put the watercolor on a small,low easel-like a plate easel. Then on the shelves, centered above the sideboard, I'd put my most special item--for me, it would probably be glassware. Great job! Looks like a magazine. :o>
ReplyDeletei LOVE it, especially in conjunction with the yellow lamps. it looks perfect in front of the bookshelf- but i'm thinking that picture is a little wonky!
ReplyDeletei love this so much!!!
ReplyDeleteSister Crapo!!! You are one of the most talent women I know!!! I am so impressed! I want to be like you!!!!
ReplyDeleteWhat hard work, but it definitely paid off. It looks great!!
ReplyDeleteRandom question... how did you get the poll to be in your blog post (rather than on a side bar)?
tylerandemily.blogspot.com
Jess,
ReplyDeleteIt all looks incredible!!!
I completely sympathise with trying to arrange stuff on your shelves!! We bought a couple of big cubed bookcases recently, I was so excited about organising them and now I just feel lost!
ReplyDeleteYour room is looking just lovely, I'm jealous! ^_^
Looks fab! I'm currently working on the same project and this post inspired me. Thanks!
ReplyDeleteJust found your blog. Love it. And the sideboard turned out FABULOUS.
ReplyDeleteJust found your blog. Love it. And the sideboard turned out FABULOUS.
ReplyDeleteYou've inspired me to do a dresser with a natural top/painted body. Gorgeous redo here!
ReplyDeleteDRESSER TURNED OUT BEAUTIFUL.. LOVE THE COLOR AND THE FINISH
ReplyDeleteI love that you kept the top the original color! I love the blue too. I have a similiar hutch that I have had forever- and haven't decided on what color....hhhmmm might have to do it like this! :)
ReplyDeleteGreat job! I love the color and the glaze overlay.
ReplyDeleteThank you for stopping by, we love to hear from you!